How to use GNS3 step by step Tutorial Work with GNS3
How to use gns3
Gns3 is a famous network simulator used for simulation and practicing different network setup or scenario in real time. You simulate routers and switches on your pc without having the real one. The advantage of GNS3 as compare to other simulator is that it uses real Cisco IOS. With gns3 you can also simulate layer 3 switches, firewall (ASA) and juniper router as well. This article is about “ how to use gns3 step by step all configuration”
How to work with gns3:
This article is for beginner which will help them for working with GNS3 from start. So start with the step by step process by following these steps you can easily use GNS3 even if you are using it first time.
-
- Download and install the GNs3: Go to gns3 official website and download the latest version of GNS3 from there. You need an account for downloading; you can sign-up for free here. Once you sign-in into your account download the gns3 and install it. Installation of Gns3 is simple and straightforward. You can watch the following video if you have any issue in installation and downloading.
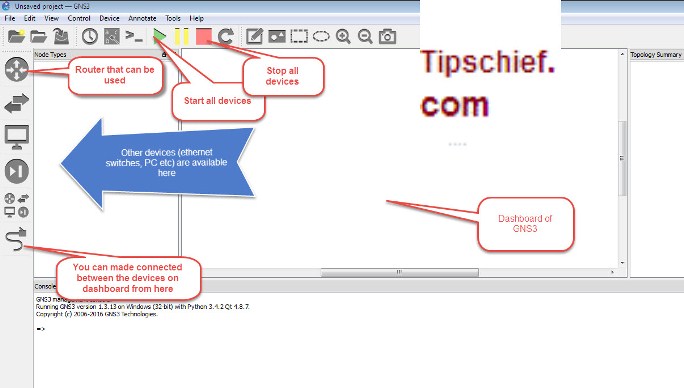
2. how to use gns3 : Once the installation is completed, open the GNS3 and you will see the following GNS3 screen.
For using any network device like router or switch you need the IOS of that device, GNS3 does not provide IOS you need to download it from internet or get it yourself.
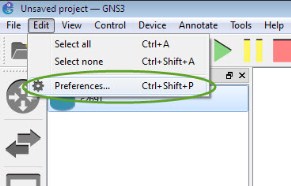
- Once you have an IOS of router or switch you need to add that IOS in GNS3, for this click on the edit/preferences.
Now from IOS router tab click on new and browse for cisco IOS.
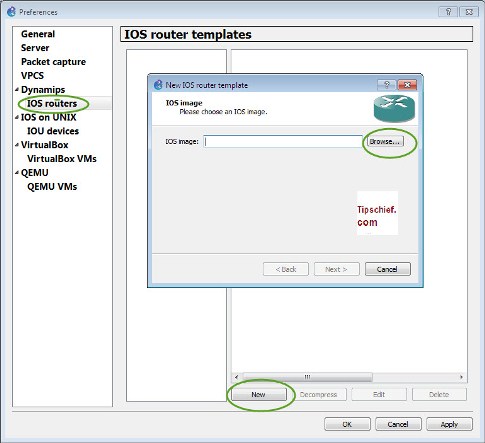
One important thing while using adding IOS in gns3 is idle pc value. If you did not add any router in GNS3 then you will get the error message “No router has been configured you must provide your own router images in order to use gns3”. For more detail on adding GNS3 IOS you can play the following video.
Recommended IOS for GNS3 are 3640, 3660, 3725, 3745 and 7200 IOS images listen below, they have proven to be the most stable for GNS3.
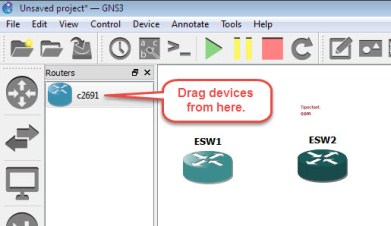
- Once you have add the router IOS in GNS3, click on router sign and drag the router IOS on dashboard.
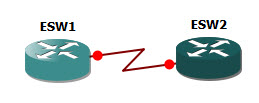
Now for making connection between router or switch click “add a link”on from left down corner and then click on device which you want to open with other device. When you click on device it will pop up all the available interfaces. Select the interface and connect it to other device.
- Now you need to power on the device, simple click on start all devices button or right click on every single device and then click on start.
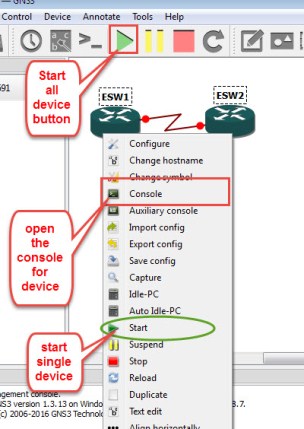 6. For configuration of any device right click on router and then click on the console and it will open the configuration console of router. You can review the above image for more detail. Once console is opened you can configure your router and can run all the cisco commands here and create your gns3 labs as per your choice.
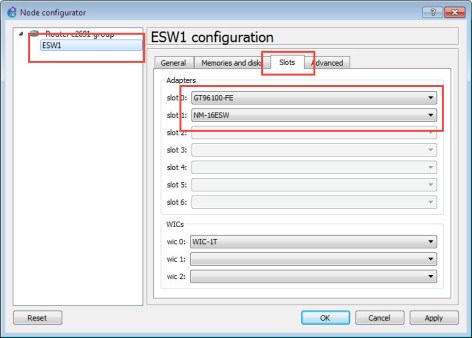
7. You can also change the router interface and can also add interfaces of your choice. For this when your router is power off/Stop right click on it on then click on configure. Then from slot tap you can select enternet and serial interfaces for your router. For example if you want you select or add more serial interface select it from WICs slot from bottom.
I hope this article will help you in getting start with GNS3, let me know if you still have any question regarding it.
Leave a Reply