How to insert header and footer in excel
As you are familiar that header is at the top of the page; while a footer appears at the bottom of page. Actually, headers and footers are the test which an editor want to display on each page of his document. It may be company name, address, or any other information regarding to the document. Here is very simple method for its insertion. You will become master after reading how to insert header and footer in excel post. The best way to learn is to practice and teach other. This method is for MS Office 2010 to 2013 or latest version.


Learning is a practical process. At first, you should know that what a header and footer can do for you. Insertion following things is possible in either MS Word or Excel’s document.
The below image shows us that Page Number,(Total) number of pages, current date, current time, file path, file name, sheet name, and picture can be inserted as header or footer.
Tips to insert header and footer
- First, Select the Insert tab.
- Click either the Header or Footer command, available in “Text” ribbon probably second last in Ms Excel and fourth last in MS Word.
- Click Design tab.
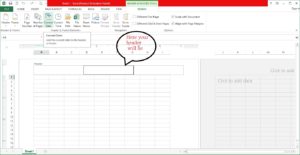
This will appear in MS Excel.
At first place/click cursor either at Header or Footer where you want to insert above mentioned items. Just Click on any of “Page Number” or “Current Date” command to insert it in your document. In Ms Office 2013 or earlier version of MS 2010 you can insert header and footer items by single clicking.
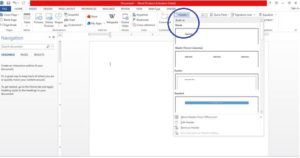
Moreover, you can insert header and footer in MS Word by following method:
- First, Select the Insert tab.
- Click either the Header or Footer command, available in “Text” ribbon probably second last in Ms Excel and fourth last in MS Word.
- Click Design tab.
If you want to study about MS word 2013 in detail then please see following tutorial, in which each and every thing is explained in detail.
Microsoft office 2013 tutorial | Tips and tricks for Microsoft office 2013


Pingback: Word experienced an error trying to open the file