Microsoft Office 2013 tutorial | Tips and tricks for Microsoft office 2013
Here a comprehensive review and guidelines are compiled for Microsoft office 2013 in shape of “Microsoft office 2013 tutorial” with Tips and tricks for Microsoft office 2013. Shortcut keyboard commands are also incorporated. This tutorial is mixture of questions and answers and tips for beginner as well as expert users.

Microsoft word tips
What file tab contains in Microsoft word/excel/word etc?
It has New, Open, Save, Save As, Print, Share, Export, Close, and Account, as well as Options, That enables us to change Excel’s default settings.
What is quick access tool bar?
Save, Undo, and Redo buttons are presented in this bar for user ease.
How to customize quick access tool bar?
Click right side of above bar arrow
A dialogue box will open
Select the options from this box or uncheck which are not required.
What is ribbon in Microsoft Office?
Ribbons are arranged into a series of tabs ranging from Home through View.
MS word components or Groups.
Each ribbon is summed up with basic working units which I usually referred as group
By clicking HOME ribbon a group containing “Clipboard”, “Font” , “ Paragraph” , “ and “Styles” is shown.
MS word Home Ribbon tab.
HOME is a ribbon containing “Clipboard”, “Font” , “ Paragraph” , “ and “Styles” is shown.Clipboard is first Group under HOME ribbon having CUT, COPY, PASTE, FORMAT PAINTER Short cut commands are
What functions are available in INSERT ribbon of MS Word 2013.
![]()
Insert Ribbon have following Groups
Pages
It has Page Break (Ctrl + Return, Inserts break into the page of a document), Blank Page (Inserts a blank page into the document), Cover Page (In inserts a and helps us to add a cover page or very first page of the document).
Tables
Tables are used to arrange you data in forms of Rows and Columns. In includes “Insert Table”, “Draw Table” , “ Convert text to table” , “Quick Tables (Contains built in samples and model of tables ) Table can also be inserted by wizard at top of the table dialogue box.
Illustrations
You can perform following functions from illustrations:-
Pictures : This command is used to insert any picture from your PC.
Online Picture : Enables us to insert any picture from internet to our document.
Shapes: You can add and draw following types of shapes from shapes command
Lines: you can draw straight as well as curved lines from this
Rectangles: include different types of rectangles to draw into the document.
Basic shapes: It includes some basic geometrical shapes as well as Callouts, Brackets etc.
Block Arrows: It is another useful feature of “Shapes”, comprises of various types of arrows.
Equation Shapes: Equation Shapes are arithmetic operators like +, -, which can be inserted from this subheading of “Shapes”.
Flow Charts: If you are drawing flow charts, this category of Shapes group will solve your problem.
Stars and Banners: Includes various types of stars and banners shapes.
Callouts: Various types of callouts for publishing and articles are available.
SmartArt : Several illustrations and relationship diagrams like Process, Cycle, Hierarchy, Relationship, Matrix, Pyramid, Picture etc.
Chart: Various types of charts e.g. Pie, Line, Bar, Area, Stock, Surface, Radar and Combo charts may be drawn now in MS Word. Earlier this feature was only available in the MS Excel, but one can use this application in MS Word as well.
How various types of images and geometrical figures can be drawn from MS word?
As mentioned above “INSERT” ribbon provides various types of commands for insertion of figures and smart art in to your documents. Illustrations and Symbols are basic Groups available in the INSERT ribbon which are used to draw figures. You can draw any figure by single clicking on the desired shape and the by clicking and dragging on the word working area you can draw it.
How to insert screen shots in MS word 2013. | Screenshot Microsoft word.
Screen Shots: Screen Shots of any window opened on your computer can be drawn by just clicking on the screen shot icon, in Illustrations on Insert Ribbon. It will capture the screen and will be saved in screen shots icon which can be inserted in the document by clicking on the saved image in the screen shot icon.♣
What are Add- Ins?
Add-Ins: These are mini tools or software which can be inserted in to the document for useful purposes. Add-ins in MS Word are “Store (leads you to Office store for installation of various types of apps), My Apps ( It saves your recent used apps), Wikipedia (Wikipedia is internet based encyclopedia provides access to enormous information and knowledge while writing any sort of article in MS word).
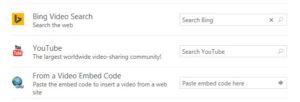
Media: Media is used to add any video from internet, by clicking on the “Online Video” of media group, a dialogue box will open having three features as
You add your desired video by searching it on the webs BING, YOUTUBE, or pasting code your own developed video in the “From a Video Embed Code”.
How can you insert links and references in MS word 2013 document?
Links: From Links group you can insert following links:-
Hyperlink: Ctrl + K is used as shortcut command to link your document to web portal. It can also be used to make link in between your document.
Just click on the “Hyperlink” command a dialogue box will open
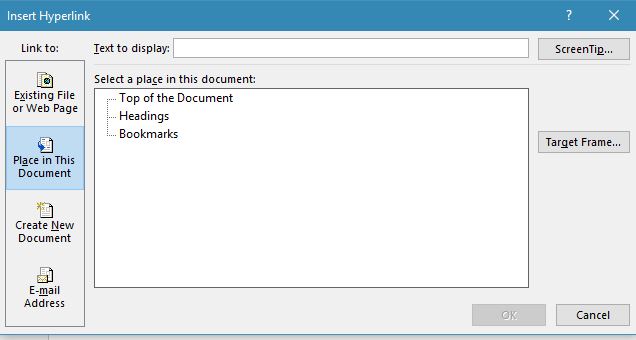
In this dialogue box “Text to display :” is text or line in your document in MS word which you want to link. Here box explains on left side that user can link its documents in four ways which are—Existing File or Web Page, by clicking this you can link existing file or documents already present in your computer.
“Place in This Document”—is the second feature displayed on the left side of the box, it guides us how to position your linkage.
“Create New Document—is the third feature available in the hyperlink dialogue box, if you want to link a new document or you want to edit the document before its linkage into your existing document, this application will guide you to solve your issue.
“E-mail Address”—is the fourth feature which is for adding link email given in your document or you can link any text in your document while saving any email in the place given in this dialogue box.
“Bookmark”—if you intend to go at the bottom of the document or at top of the document at once then Bookmark will fulfill your desire.
Cross-reference—is the hyperlink which is used to include the name of things which you want to reference in your document.
How one can insert comment in the MS word document?
Go to the INSERT Ribbon then “Comments” group to add any information or note about the current document.♣
What are Headers and Footers how they can be inserted in the document of MS word 2013.
Group Header and Footer is the group under the INSERT ribbon you can use these commands as detailed below:-
Header:- It appears at top of document’s page. Header is the text or heading which you want to repeat on every page of your document. By clicking header you can add or edit already inserted header. Header also can be removed from the header dialog box.
Footer: – This appears at bottom of document’s page. Footer is the text or heading which you want to repeat on every page of your document. By clicking Footer you can add or edit already inserted footer. Footer also can be removed from the header dialog box.
How can page Numbers can be added to word documents?
Page numbers can be added from “Page Number” command in the “Header & Footer” group under Insert ribbon. Header and Footer option can be used for insertion of page numbers.
Text: Text group includes “Text Box”, “Quick Parts”, “Word Art”, “Drop Cap”, “ Signature Line”, “ Date and Time” , “Object”, .
How one can add text box to the MS word document?
Text box is for insertion a note or quote in between the Microsoft office document. by single clicking you can add a text box after following the built instructions and layout in the dialog box. In the similar manner you can edit or modify the inserted text box.
Quick Parts: One can use this group for adding quick text i.e. Auto Text ( you just write one or two word of a text and this feature enables you print already saved text in the Auto Text dialog box ).
Word Art: Artistic and painter types text add by this command. Click and use built in text to change shape and format of your heading sub headings and illustrations in your documents.
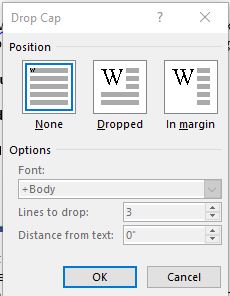
Drop Cap: One of the most favorite writing style of various newspapers as shown below, in which size and font of high rank is used for first letter of first word of a document. you can use by using the built features of drop cap using drop cap dialog box which appears when you click at drop cap option
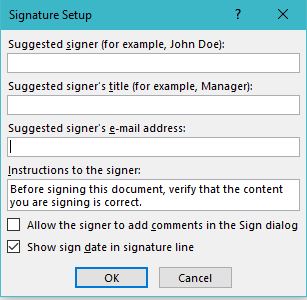
Signature Line: is for adding signature and into the document by the following dialog box
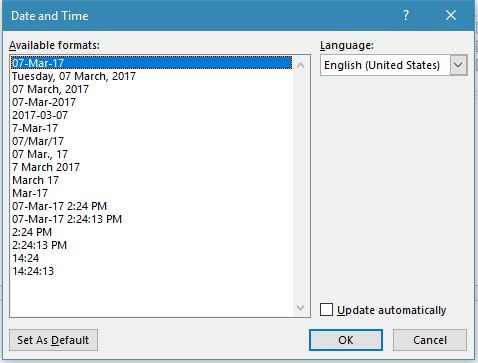
How Date and Time can be added in MS word 2013 documents?
Date & Time : Feature available under the INSERT tab/Ribbon. by clicking this icon, a dialog box will appear which has built in formats of date and time which can readily used :
How one can insert another file or document into MS word 2013 file?
Go to insert tab/Ribbon
Find “Text” Group.
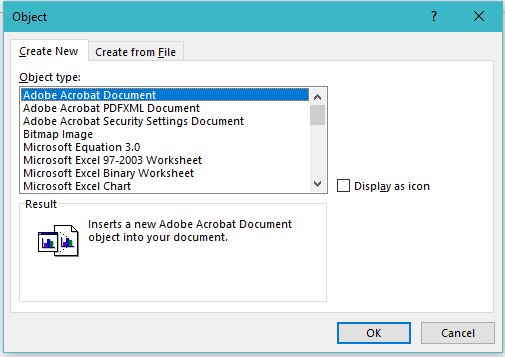
Click Object, a dialog box as shown above will open.
Follow the instructional commands to add file.
How one can insert symbols in MS word 2013?
Special keyboard characters and symbols in Ms Word can be used from Insert–>Symbols–>Symbol, first most recent or frequent used symbol will be shown, by clicking on “more symbols” you can get a dialog box as shown below:-
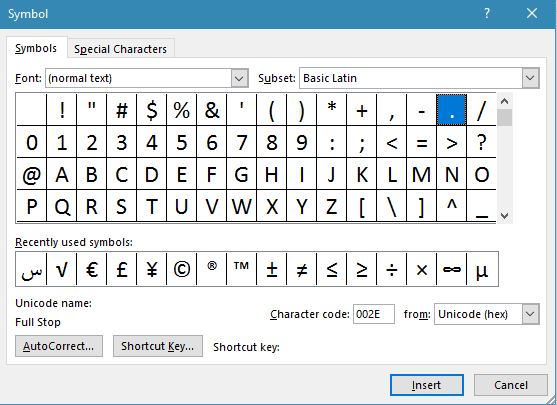
from above dialog box you can use symbols like, basic Latin, Latin, Arabic, etc. while special characters are ,mostly available on keyboard as well may be used.
Another feature of Symbol is to Insert equation (Insert–>Symbols–>Equation) , You can insert and edit mathematical equations and formula from this command.
By inserting or clicking Equation a design ribbon/tab will appear to further guide and simplify your working:

you can pick your needed items from above ribbon while writing any equation and formula.
How to use themes and formatting styles in MS word?
Themes and formatting styles are available in the following sequence in MS word 2013.
Design (Ribbon/Tab)–>Themes / Document Formatting
You can select your favorite themes and document formatting styles from the built in format available.
Moreover following built in commands can be applied to whole or a part of selected document from Design tab

- Colour
- Font
- Paragraph spacing
- Effects
- Water mark
- Page Colour and Page borders.
How to insert watermark in ms word 2013?
Design–>Page background–>Water mark
From above dialog box one can add ones required water mark either from the given template or can customize from the “Custom Water mark wizard” available in the above dialog box.♣
Microsoft word 2013 page layout.

Following operations can be performed on MS word document from page layout
- margin
- orientation
- size
- columns
- breaks
- line numbers
- hyphenation
- paragraph indent
- paragraph spacing
- position
- wrap text
- bring forward
- send backward
Page setup word 2013
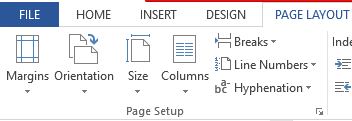
How to do Page layout–>Page setup
One can perform margin, Orientation, Size, Columns, Breaks, Line Numbers, Hyphenation from page setup group.
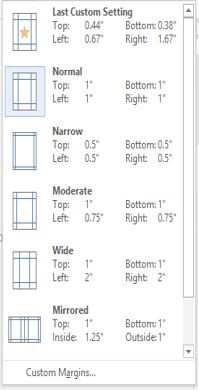
for setting margin click margin a dialog box will appear:-
From this menu you can select default page margin i.e. “Narrow“, “Moderate“, “Wide“, “Mirrored“, “Office 2003 Default”. . Just click any one of the function and they will be automatically applied to the document if there is no selection otherwise selected document will be organised as per your selection.
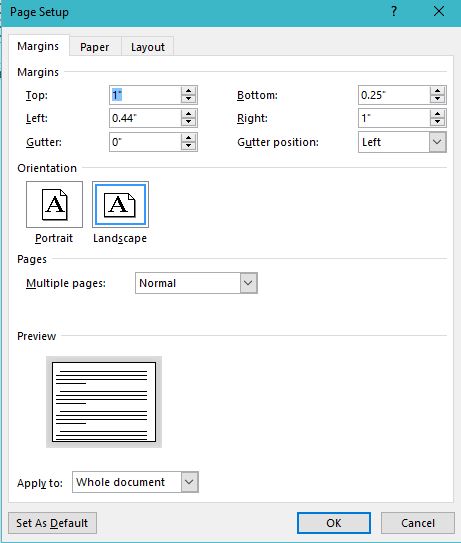
If you want to set your own page margin the select last application “Custom margin” a dialog box as appeared below will be be opened. From this you can define your own page margin. From below dialog box you can set page margin as well as Paper type and its layout.
Tips to make paragraph setting in MS Word 2013
Proceed as Page Layout—>Paragraph
One can make following operations on ones document by “Paragraph” group under Page layout.
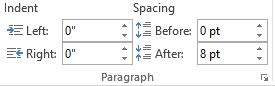
Indent setting: It extends farther away the written text from left and right side of page. From “left indent” you can choose to select how far written text may be from left side whereas “Right indent” enables you to move the text away from right side of page.
Spacing: Spacing lets you decide how much space you want to make between your paragraphs in your word document. Normally before and after the paragraph spacing is made.You can apply “Indent setting” & “Spacing” from following by just mouse clicking after selection of specific text.
Arranging of object and picture in MS word document
From “Arrange” group under “Page layout” you can adjust your images, pictures and objects already inserted into your word document.
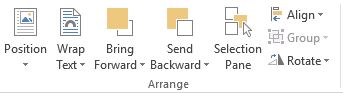
Following commands are applicable from Arrange group:
Position: It performs variety of functions on your image, At first after clicking on the “Position” you will see a dialog box from which you can adjust position of object by built in setting by single clicking.
However, other functions which are used are as under:-
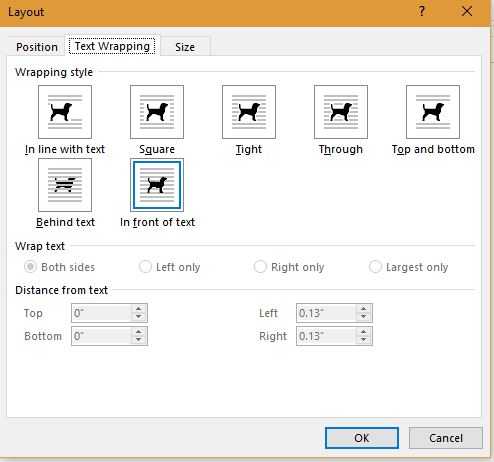
Besides, Position one can easily make (Wrapping is setting of image below and above the text etc.) warp setting as well as size of ones image/object.
More text and image wrapping setting can be done from “Wrap Text” .
Next four commands button are also used to make individual functions of warping and adjusting of object in MS word document.
References tab/ribbon is exclusively available for those who want to publish a book or a research paper. It is a fully functional and automatic tools and a sort of apps which is actually embedded in MS word 2013, that is covering all features of publishing a book before it is sent to Press.♣
Adding index or table of contents in a document or a research paper in MS word 2013

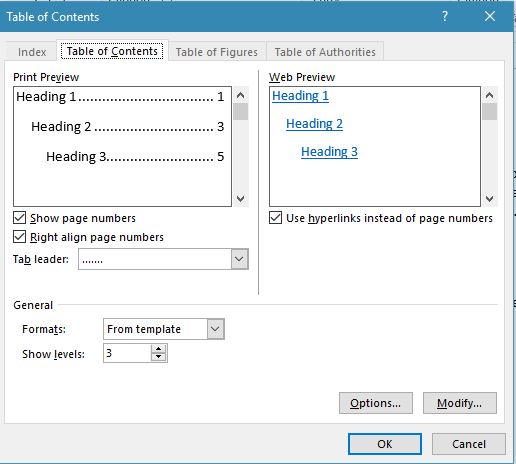
References –> Table of Contents
This group includes “Table of contents”, “Add Text”, and “Update Table” commands. Table of contents is collection of built in functions that are used to put contents into the documents.
Add Text: It is just like heading or level of text as one insert in web designing or writing a blog. Level 1 to 3 heading style are found in this menu.
Update Table: This feature enables you to update the data and text in the table.
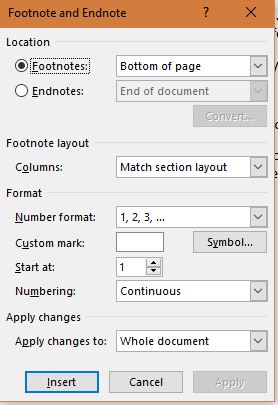
References –> Footnotes
Footnotes group contains “Insert Footnotes”, “Insert Endnote”, “Next Footnote”
Foot notes are actually information or points of reference made to the particular page of documents. Footnotes usually resides at the end of page.
“Insert Footnotes” option helps us to add and modify foot note at the end of page. You can use command “Next footnote” for adding a new footnote in the same documents. This feature also keeps record of all footnotes inserted by users by numbering 1, 2 3 ….
Insert Endnote: is a feature of MS word which guide us to add references or related information to the document in between the text or a page or anywhere in the page other than foot note as later is added only at the end of page. This feature also retains record of all Endnote used in the documents.
Show Notes: if you want to get print of all your notes or want to review or see this feature will help you.
Citations and bibliography
Sources are key points and heart of a document. MS word 2013 provides one of the best options for managing sources and information.
Under References –> Citations and Bibliography you can store and manage your sources. “Manage sources” enables us to manage our sources of text and documents. by click at “Manage Sources” a dialog box will appear , this dialog box ensures to insert, list and search sources, in fact this is s repository of sources which is available all the time.
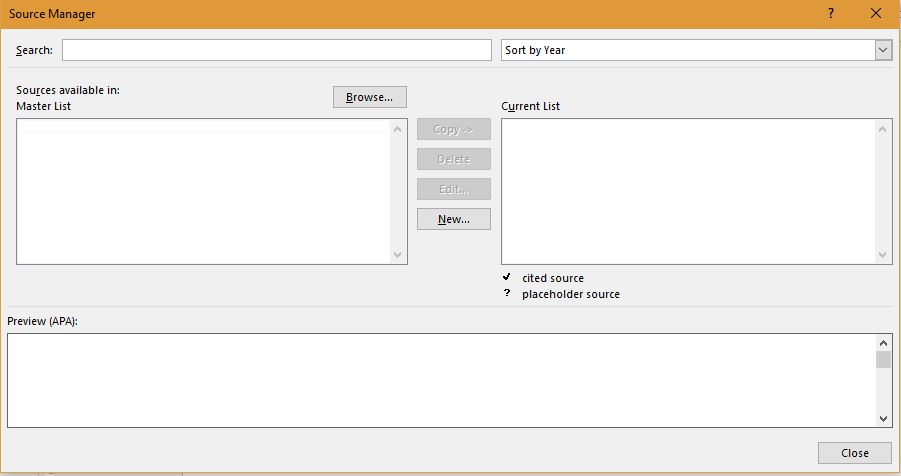
“Bibliography” command facilitates you to save all of your sources. While “Style” and “Insert citation” respectively guides us to select a style and insert new reference.
Picture captions
The Next group under “References” tab is “Captions“…Caption is actually list and name of figure given under each image inserted into the document. Captions are also automatically handled and stored as “Citations and bibliography” are saved.
Index in MS word
Index or list of headings or references in MS word 2013, can be employed from “Index” group under “References” tab. Alt + Shift +X is short cut command that guides us to add and store index in the document.
Table of authorities word 2013
You can use “Table of authorities” for building your reference store for your book or a document. Table of authorities are actually rules, cases, treaties, and references which are given in the documents as a proof. You can manage these by “Insert Table of Authorities” command.♣
Mailing in Ms Word | Mail and merge in Ms word 2013
Tab/Ribbon of “Mailing” in Ms word 2013 has enormous features. It helps user to prepare and send documents in efficient and easy manner. Mailing ribbon consists of following sub groups/commands namely;
- Create
- Start Mail and Merge
- Write & Insert Fields
- Preview Results
- Finish
Lets now find what each of above group/commands can do for us:
Create: It has two commands “Envelops” and “Labels”. By clicking envelops a dialog box will appear. From this box one can set address i.e delivery and return address on the envelope. At last you can get print on your desired envelope.
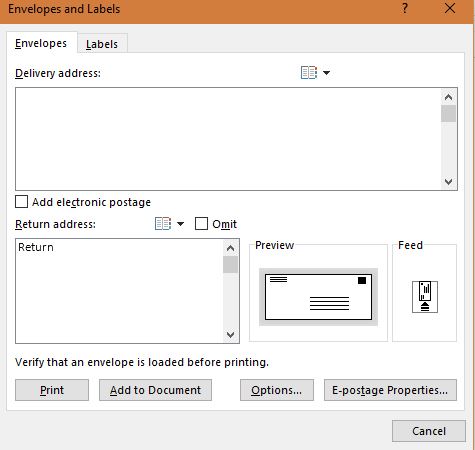
However if you want to send your letter via electronic mail ( Email), then “Label” command will help you to create label instead of address.
Mail Merge in MS word
If you want to send a single document to multiple persons then you have to choose mail and merge command in Ms Word 2013. Group “Mail & Merge” contains following sub groups/commands that helps us to prepare a complete lists of addressee, letters, and their issuance with accuracy and ease.
- Letter : By clicking “Mail & Merge” , “Letter” will be the first option in the dialog box. after clicking letter a new blank document will appear, either you type your new document or paste in to the existing blank page.
- Email-Messages: Most of the companies now use Email feature instead of sending letter by post, due to fast and reliable delivery of former. By clicking “Email-Messages” a blank document will appear you either paste your message here type a new one.
- Envelopes:One can set length width and orientation as well as print setting of your envelopes. A dialog box for this purpose is as under which guides us in easy way to accomplish our job related to envelopes setting and printing in mailing.
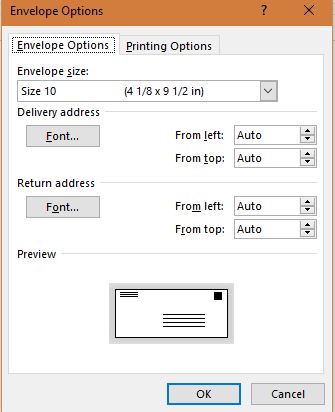
- Labels & Directory are other two functions that are available under the tab of “Mail & Merge” you can use them by following the step by step procedure given in each dialog box after clicking the each of any command.
Step by step by step “Mail merge wizard
This is the last item of “Mail & Merge” command under group “start mail and merge”. This is rather convenient and easy to apply. just following the instructions of the wizard and get your task done.
You can also edit the recipient list by clicking ” Edit recipient list” . This command is part of same group.
How to prepare a letter in a better way in MS word 2013.
User can easily mange his/her letter by following the commands available in the group of “Write & Insert Fields” (i.e. Mailing–>Write & Insert Fields)
- Highlight & Merge Fields: To make alert about your points you can highlight your main points and heading by using this.
- Address Block: It facilitates you to write the address and set their formatting.
- Greeting Line: One can add greeting line as per his/her choice in the document.
- Insert merge field: Helps you to add some selected merged items into the documents. ♣
Proofing tool in office 2013 and how to insert comments in Word document
To check spelling and grammar mistakes in your documents, is often referred as proofing. It was one of the difficult tasks of publishing, often publishers had to hire a proof reader for proper checking of prepared and final draft of a publishing. Now MS Word has made this hectic job easy and simple. Let us see how it works.
Review tab/ribbon contains “Proofing” group other groups available under this ribbon are “Language”, “Comments”, “Tracking”, “Changes”, “Compare”, and “Protect”. We explain one by one for you, at first instance “Proofing” is being elaborated here.
Group “Proofing” contains
Spelling & Grammar : Press F7 or Click “Spelling & Grammar” button to correct your spelling and grammar mistakes. Often MS word offers three options i.e. –ignore-(ignore the current highlighted mistake only)-ignore all-(ignore all will ignore the current visible word and such other similar words in your document) –add-( if there is a word which is local or some phrase not found in the dictionary you can add it in to your document next time word in spelling correction option will show the added word also.).
Define: will help you to put the definition of word, you can use this by pressing Ctrl + F7 or just clicking on the define button. Either give your own definition of the word or paste it from the dictionary open during this operation from the internet.
Thesaurus: Spelling meaning often troubles us, so do not worry just click thesaurus and write your word and get their similar meaning word.
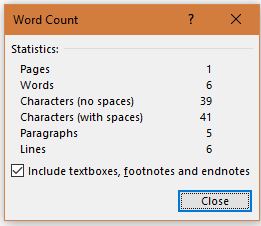
Word count: It counts the following in your documents as shown in the below dialog box.